Saturday, August 5, 2017

Reflections on 2017 Costume College & the Two Dresses

Dedicated, as my whole blog is, to my friend Megan.  May we both continue to pursue our dreams.  :)

As I'm sitting here, looking back on the crazy fabulousness that is Costume College (my 13th year!), dreaming of 2018's theme "The Royals" and the achingly beautiful creations I plan on creating (or, to be more specific, finishing), I get very reflective in the quiet aftermath.  My treasures have been put away, the laundry is being run, my teacher checks have been deposited, and my cat is sulking quietly in the bedroom.  How did Costume College go, you may ask?

In summary:
I wore two dresses
I taught two classes
I attended three classes
& I was on the Costume College Committee.

Phew!

"But that's no excuse for why you haven't posted since January.  JANUARY!!  My god, woman, what have you been doing with your life since then?"

Okay, fine, since you asked.  :)

For some reason this year, when I got back from Christmas, my life became doing events one weekend after another!  From friends visiting, to going to two Jane Austen events, to doing a fashion presentation near Lompoc (twice!), then coming back down to visit the "Revolution", going to tea, Calico, wow!  From January-March, it seemed like every weekend was booked!

(Oh!  And there was a brief mad dash as it appeared I could be a vintage dancer appearing in the TV show "Another Period" on Comedy Central!  Yeah, that didn't happen, but it was fun while it was prospective.  And I got to practice with creating patterns from a Frances Grimble book, so that was fun.)

And then, after March, suddenly I had all these Committee things to do.  (Ugh, being responsible, amirite?)  Meetings to attend, forms to create, forms to track.  Fortunately, I had an AMAZING assistant, who volunteered before I did, and who I met RANDOMLY by looking out of place and lost at the Jane Austen dance.  At an event attended by possibly 200 people, it was very fortunate indeed!  My one planned family vacation was to head to the East Coast around Memorial Day, and when I got back, it was full speed ahead with keeping track of who paid for classes!  Then there were emails to answer, and people to console, and plans to make for actual Costume College, and that bring us to today.

The two dresses (and the two classes!):
Back in January, I had submitted to teach three classes: my usual "Beaded Embroidery", and "Chandelier Earrings," and new this year "Ladies of Downton Abbey Necklaces" (so named because I didn't want to commit to whose necklace I was replicating).  "Beaded Embroidery" did not get chosen (probably because I tried to hide it at the Wall Party, shhhh!), but "Chandelier Earrings" and "Ladies of Downton Abbey Necklaces" did.  Yay!  The necklace class proved to be REALLY popular at Registration, and was full!  Go me!  So, the pressure is on!

As a teacher, you see the numbers for your classes about 1 month to 6 weeks prior to Costume College.  This means you have that time to order materials, create a handout, and finalize your prep. When my supplies arrived, I made a sample for me to wear, to show the final result.  And I knew, that because of my hectic schedule, I wouldn't have time to finish any of the dresses I had planned.  (Victorian bodices take me about a month to finish, from first cutting the pattern, to sewing on the buttons/inserting the boning.)  Instead, I had a GORGEOUS 1920s hat that I'd bought from Mela Hoyt-Heydon at Costume College 2016 (my first 1920s anything!), a bunch of 1920s patterns I had bought to go with it, and now, a 1920s necklace (and earrings!) that I would have finished.  Don't I need a dress to show them off?  Am I crazy, or do I have JUST ENOUGH TIME to make a 1920s dress?

(To clarify, yes, I am crazy.  But challenging my own perceptions of what I can do in a given amount of time make me happy, and the following emotional roller coaster and dirty condo gives me something to ponder.)

And away I go!

So, once that was decided, I promptly left to go to the LA Garment District, buy my fabric, go home, and get it made!

Of course, that was THE PLAN.  What actually happened?  I think I took a nap.  And then procrastinated.  And then the weekend before Costume College a friend of mine came into town, we went to Disneyland, and the next day I went to brunch, and took another nap.  (Having a deadline is sometimes the only way I get anything done!)

The 1920s dress:
(Sadly, only now am I discovering I took no pictures of myself that day!  But never fear, I did go to the portrait studio to get professional photos taken.  Now we're just waiting for those photos to be uploaded so that I can buy them and download them and post them!  Aaaaaaaaaaaaany day now.)

I used the Decades of Style "Zig-Zag Dress" pattern, without sleeves, and with a V neck (because it's summer in Southern California, and it got up to 98 in the San Fernando Valley on Thursday.)  Initially, I had planned on a light silk gauze, hopefully in a teal/brown pattern.  I couldn't find that, and I didn't want to make it a solid teal, so I chose two shades of brown.  I had thought of doing the top in one, and the bottom in another, but the lighter shade of brown didn't have enough, so I just added some embellishments.

Part of the challenge for me is that I am SO used to Victorian bodices, where everything must be fitted to a T!  And I've gotten used to that, to the extent that flowy things puzzle me.  (It just, sits there?  Are you sure?)  I did make a mock-up, mostly because I assumed I'd have to lengthen the bodice (I didn't), and fit the shoulders (which I did).

Image result for 1920s Downton Abbey
Edith is my spirit animal!  Love those colors!
After I made the first mock-up, I honestly tried to stop myself from doing any fitting.

Brain: Just a few tweaks . . .
Faith: No!  Give it a chance!  You're just not used to this period!
Brain: But, it would look so much better . . . ow!  Why are you hitting me?

In the end, my brain went to trusty Downton Abbey, and I decided there's fitted, and then there's FITTED.  Tweaking the armhole so that the bust fits better, and cutting off the top of the ends of the armholes so that they sit nicely just behind the point of the shoulder (see Rose below), and it felt like the difference between "bespoke" and "off the rack".  And I thought it looked so much better!
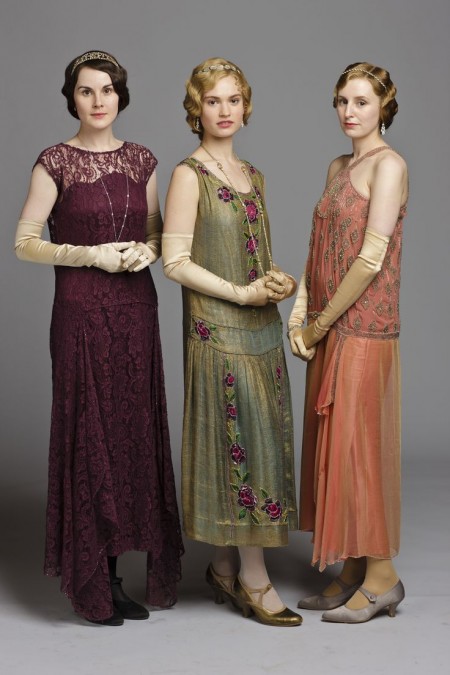
Image result for 1920s Downton Abbey
Oh, the shoulders!

Image result for 1920s Downton Abbey
One day, I will make this!  One day . . .

The other dress:
Right!  There was another dress!

So, at Costume College there are four events (one per day): Thursday Night Pool Party, Friday Night Social (formerly ice cream social), Saturday Time Traveler's Gala, and Sunday Tea.  This year, I bought my ticket for the Tea before the theme was announced, which was: Vintage Sci-Fi.

Wait, what?

I'm not a big Doctor Who fan, but damn!
Not being a huge sci-fi fan, the only thing I could picture was the butt-length skirts of the background red shirt women from 1960s Star Trek.  Yeah, not only can I NOT carry that off, but it will probably be done.  (And it was!)

In discussion with a few people, they brought up an alternate idea: Why not do an outfit based on the movie "Attack of the 50 Foot Woman?"  And I was stunned!  How brilliant was that!

So, I looked up the movie, and it was perfect!  It was made in 1958, so I can wear something and call it late 50s/early 60s (to match the theme), and say I am her before she turns into the monster!  (Okay, I didn't see the movie, but it's either aliens or a radioactive substance.)

I could definitely be her!  Just wear black!

Fortunately, a few weeks prior, I had bought a BEAUTIFUL black jacket with beading from Jennifer Rosbrugh of Historial Sewing.  I think she called it 50s, so it worked!  At the time, I was thinking "It looks like the Outlander Dior jacket, all I need is a skirt!"

Image result for outlander dior dress

So, I grabbed a black modern skirt that could be 50s/60s, black heels, fake pearls, and my trusty fake eyelashes, and I was good to go!

I got soooo many compliments on this!
And THAT was my Costume College?  :)

What's next on my schedule?  Well, I got contacted yesterday by a friend of mine for an event next weekend in Santa Monica, a masquerade at an opera house, and at the end we watch the 1925 version of "Phantom of the Opera".  I'm not going to make anything new, but doesn't that sound AMAZING??

And I may not be huge into sci-fi, but I do have a particularly geeky side!


Off to buy more fabric, and plan for all sorts of costumes for the next five months!

Wednesday, January 4, 2017

Recreating a Fashion Plate- the Black and Lavender Natural Form Dress- The Plan

There are many levels of costumers, from beginner to professional, and some are more prolific than others.  I am somewhat in the middle, as far as intermediate costuming goes, as well as in the middle in terms of my proliferation.  I always have 2-3 projects "in the works", and usually they get made faster (or don't) depending on need.  This project has been in the works for several years, and it just needs to get FINISHED.  It will this year, I swear!  Mostly because I tire of wearing the same Natural Form dress to everything.  :)

All costumers fall in love with certain periods.  I have fallen HARD for the Natural Form era, specifically circa 1878, which is the early part of that period.  There are certain attractions:

     1) Trains!  Because of my height, I LOVE wearing a train, having it sweep along behind me, and make me look even longer (and thinner)!

     2) Trim!  So many fun and gorgeous trims to add!  Ribbon, ruffles, lace, and fluffy skirts!

     3) It's late Victorian, so it can usually be worn to anything that is bustle related

     4) Since it doesn't require a bustle, I can drive while wearing it, without needing to worry about how I am getting in and out, and where the bustle lays (and adjusting the layers on top so that they lay correctly).

(In later Natural Form, around 1880-1882, they removed the train, and added weird layers around the hips to make the hips look bigger.  I am not a huge fan.)

This is the first time I am making a dress from a fashion plate, without a pattern.  This is a HUGE step for me, and so I am slightly apprehensive about how it will turn out.

The Project

In doing research for patterns, I came across this image on the Truly Victorian pattern website, in the "History of Victorian Clothing" page.  (It's not there anymore, since they've updated their website.)
Something about this dress just made me think, "I want THAT!"  But of course, never having recreated a fashion plate before, I am stymied about where to start.

Let's start by breaking down the image.

Part 1- the back sides
Starting with the skirt, I am breaking this down into five parts.  The first part is the sides of the train.  In studying the image, it looks like a relatively simple shape, with decorative buttons and buttonholes, and a bow connecting the two sides.  Simple enough.  I just have to make sure the pieces are long enough for me.  I can do this!

Plan for execution:
Measure the image, and draft by hand (gasp!) a triangle that would be the same length on me.  Cut out in layers: fashion fabric, white cotton backing and black twill (since it looks like it needs to be stiff, not flowing).  Add some fabric around the edges to bind, then create buttonholes, and sew on the twenty-one (wait, what?!) buttons per side.  And then cut and sew on some fabric on each side for the floppy bow.

Part 2- the train
Ah, trains!  This looks fairly easy as well.  I am starting to get more confident.

Plan for execution:
Just take a piece of fabric, cut so that it forms a circular train, add some horsetail underneath to keep the train out.  (Note: even though the image shows pleats only going one direction, I am choosing to make pleats that go both directions.  I have also given up in advance of having the pleats remain in place while in the train.  Some things can be easily drawn, but will never stay in place given any kind of movement.)

Part 3- the front upper swag
Ah, this is where it starts to get tricky.  Since we only see part of the front at an angle, we don't get a clear image of what it's supposed to look like.  I call the lines in the front "swags", because that's what it looks like to me.  And is that fringe?!?!

Plan for execution: 
Shhhhh, it's a secret!  (Hint: I call it "don't reinvent the wheel".)

Part 4- the front lower swag
It's at this point where I realize, what the heck was I thinking!  I can't do this.  I can't draft patterns.  I don't know what I'm doing.  It's a side swag?  And what the heck's happening in the middle!  I don't know!  Is that more fringe?!  And what's with the circles?  Are those buttons?  Why are there buttons there?!?!

Plan for execution:
Go home and drink copious amounts of alcohol and hope my delusions of grandeur go away.  Blargh.

No, really, I am still pondering this part.  Since it's not attached to the upper swag (attaching them would make the upper swags droop unattractively), I am thinking that it's another layer in the front part of the skirt, underneath the upper swags, possibly meeting in the middle.  Hmmmmm.  More to study and ponder.

Part 5- the front hem
Okay, I'm back on solid ground again.  A hem!  That's simple.  I can breathe easier.

Plan for execution:
Even though this is the smallest part of the skirt we see, it also may be the easiest. It looks like just a simple front skirt, with a ruffle on the bottom, plus maybe some ribbon.  Done!

Part 6- the bodice
Oh, by all that's holy.  I have to make a bodice, too!  Why, dear lord, why????????

Plan for execution:
In looking at Truly Victorian's Natural Form patterns, I noticed something: they have a bodice pattern that matches the pattern above!  Oh, glory be!  I just need to add some ribbon and ruffles on the cuffs, fiddle with the collar, and adjust some of the pattern pieces.  Easy!  Ha!

Oh, right, and add a fabric ribbon.  And what is that stuff on the bottom?  And the friggin collar.  Did I mention that collars are my new foe?  Sleeves are evil, but collars.  Collars, you have met your match.

TV423 - 1877 Two-Tone Bodice

To be continued in - The Execution.

Suggestions, comments, questions?  Let me know!

Thanks for reading!

Thursday, December 1, 2016

The "science" of costuming

"More mad science, yo."

I got a lot of really good feedback on my last post, "Dyspelling the Myth of White Light".  So, to continue the science conversation, here is more of a thought discussion about costuming!!  (If you want to continue down this track, I can show you how a hoop skirt can be graphically represented by a porabola.  Because, math.)

I recently went with my parents to see the exhibit "The Science Behind Pixar Exhibition" at the California Science Center (click here to see more details!)  What a fun exhibit!  If you're in Southern California, and LOVE Pixar movies, I highly recommend it!

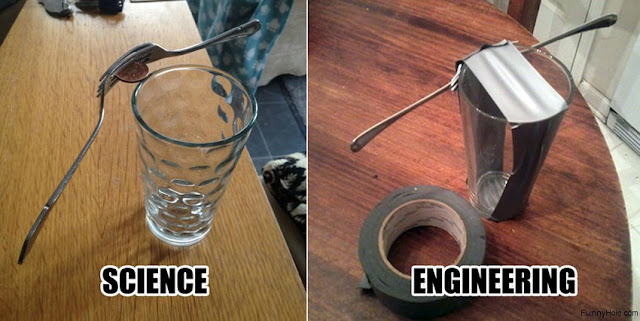
But my father (whom I deeply respect and adore, and who is himself an engineer) scoffed at the term "science".  I asked him, then, what is the difference between science and engineering.  His definition was this:

Science is the discovery of something new, through experimentation, and research.  It is about discovering what was previously unknown.

Engineering is the application of that knowledge.

Interesting.

Snicker, snicker, snort.
The closest dictionary definition I could find to this was the Oxford English Dictionary:

Science: The intellectual and practical activity encompassing the systematic study of the structure and behavior of the physical and natural world through observation and experiment.

Engineering: The branch of science and technology concerned with design, building, and use of engines, machines and structures.

Even more interesting.

In the real world, scientists are never called "scientists", rather they are defined by their area of focus.

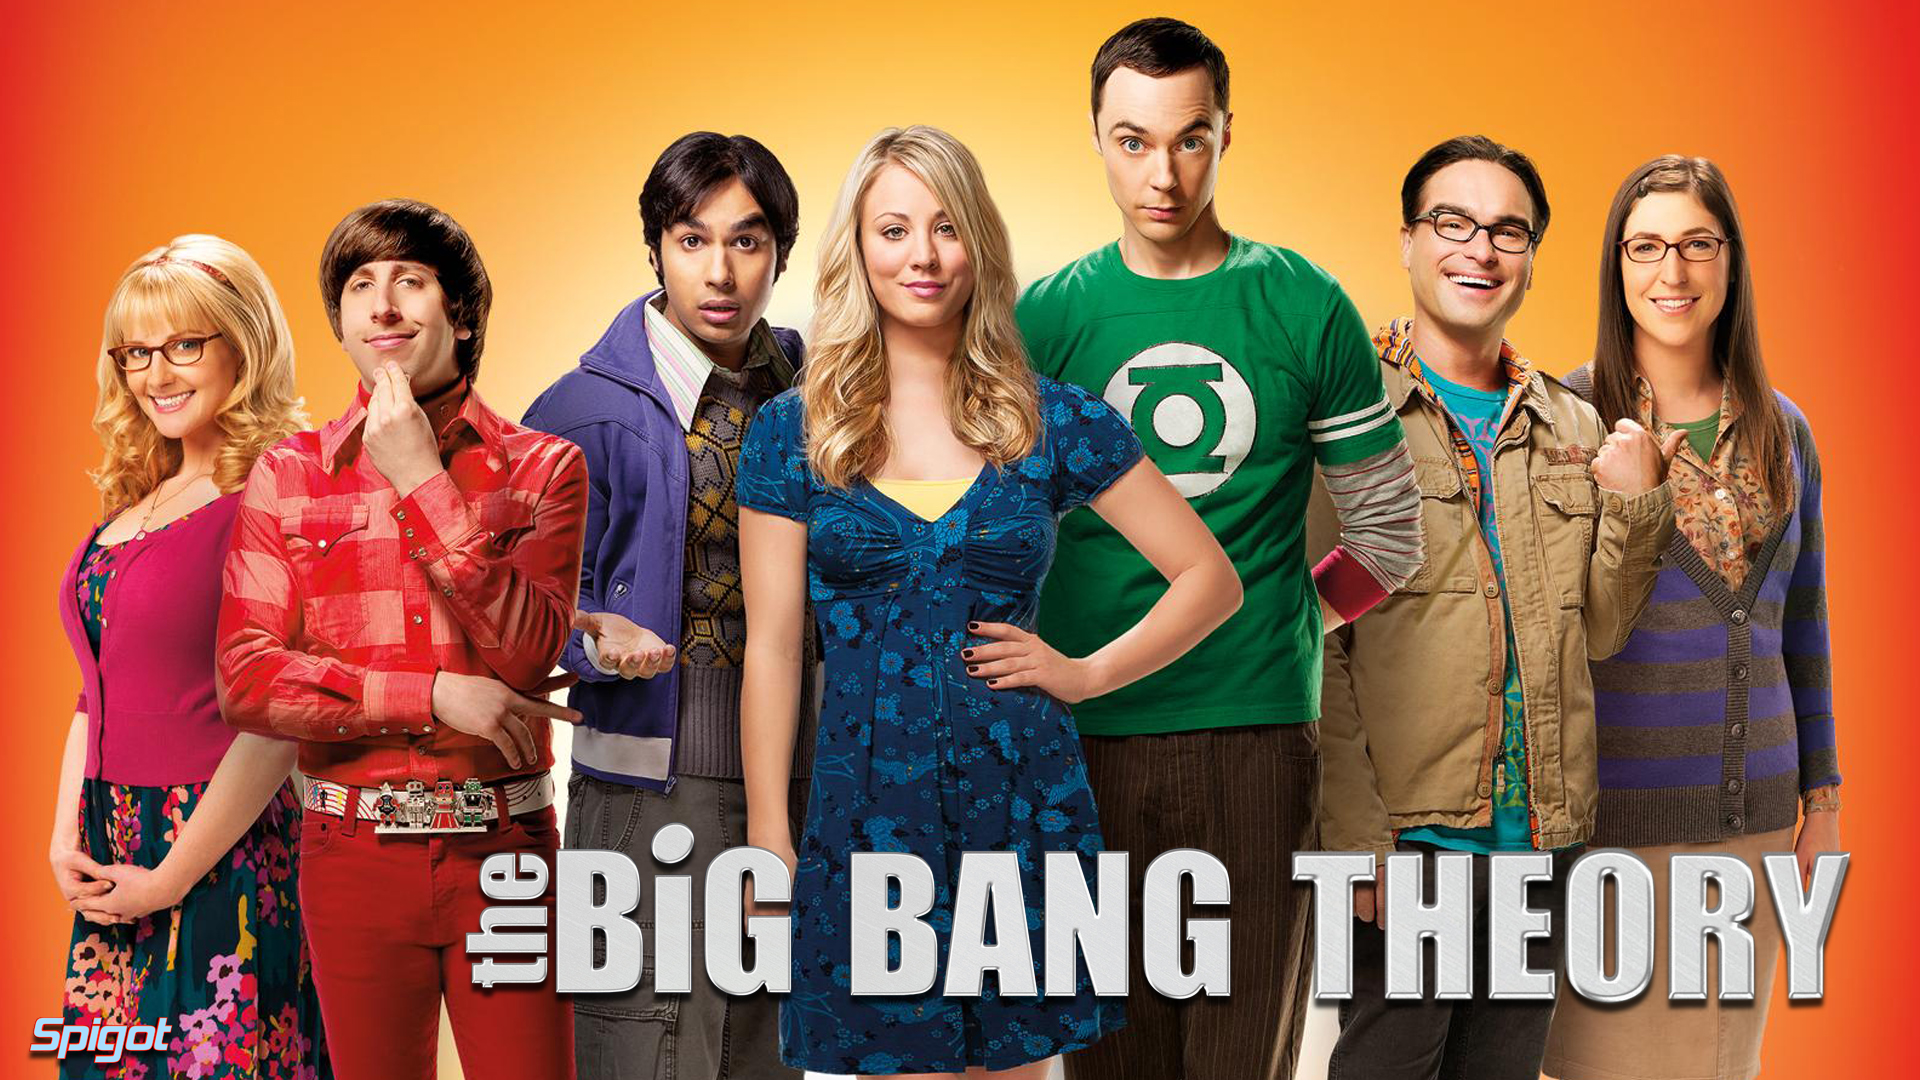
Image result for big bang theory

To reference one of my favorite TV shows, "The Big Bang Theory" (because it's AWESOME and well deserving of all the awards it's gotten): Sheldon and Leonard are both physicists, Rajesh is an Astrophysicist, Amy is a Neurobiologist, and Bernadette is a Microbiologist.  However, engineers are usually called engineers, but they are further defined by their specialty, and thus Howard is a lowly Aerospace Engineer.

(Not sure why this matters, but I thought it was noteworthy.  :)  It's called letting my geek flag fly.)

Ha!  Engineer jokes are always funny.  :)
So, is costuming a science, or engineering?  An interesting dilemma, hmmmm??

To answer that question, we need to explore what costuming is.  As we are all aware, costuming (which is both the designing and construction of costumes) is an art form.  Some art forms, like painting, drawing, photography, etc. have fewer rules that they are required to follow.  (If you can put paint to canvas, you can call it art.)  Other art forms, such as architecture, have more rules to follow.  (In order for the structure you are designing to stay up, or to follow city/state/federal guidelines regarding fire codes, American for Disabilities Act regulations, etc. there are quite a few more rules and laws.)  Costuming, in this sense, has quite a few more rules that need to be followed.  Rules such as: the person needs to be able to breathe, the person needs to be able to get in and out of the costume, and hopefully the person can do a host of other activities while wearing the costume.  Historical costuming has even more rules, and it is up to the individual how strictly these rules are followed.

If science at its base relies on theory and experimentation, then this clearly applies.  Since I only sew for myself, each time I make a new piece, most of the time I am making it using a new pattern, with different material.  Although I often gravitate towards the same materials (premium muslin from JoAnns, Radiance cotton/silk, etc.), I often use fabrics purchased online, and you can't always be sure what you're going to get.  As such, each new piece is usually an experiment.  Will it work, based on my design decisions and chosen materials?  Hopefully!  And then making of a mockup, then is the experimental procedure.  How does it go together?

However, by it's very definition, engineering is the construction of something.  By that definition, the construction of a project can be considered engineering.

As a conclusion, then, costuming is both science and engineering.  (Gasp!)  Since with each project, you are running into problems heretofore undiscovered by previous problems, and experimenting with solutions, and then creating results!  Voila!

Maybe next time I'll do a post on the hoopskirt model, and the graphic representation of a parabola.  Why?  Because math is awesome, and using math in sewing makes my inner child giggle.  Especially when teaching sewing to tweens who think that doing math over the summer sucks.  Muahahahaha!
Image result for inside out joy

Thursday, November 17, 2016

Dispelling the myth of "white" light

To start, there is no such thing as pure white light, or pure white fabric (especially fabric that reflects light, such as silks and satins), just as there is no such thing as pure black fabric.  These are just things that your eye sees as pure white or pure black.

"There is no Dana, there is only Zuul!" (Ghostbusters, 1984)

Ahem.

Let's get technical!

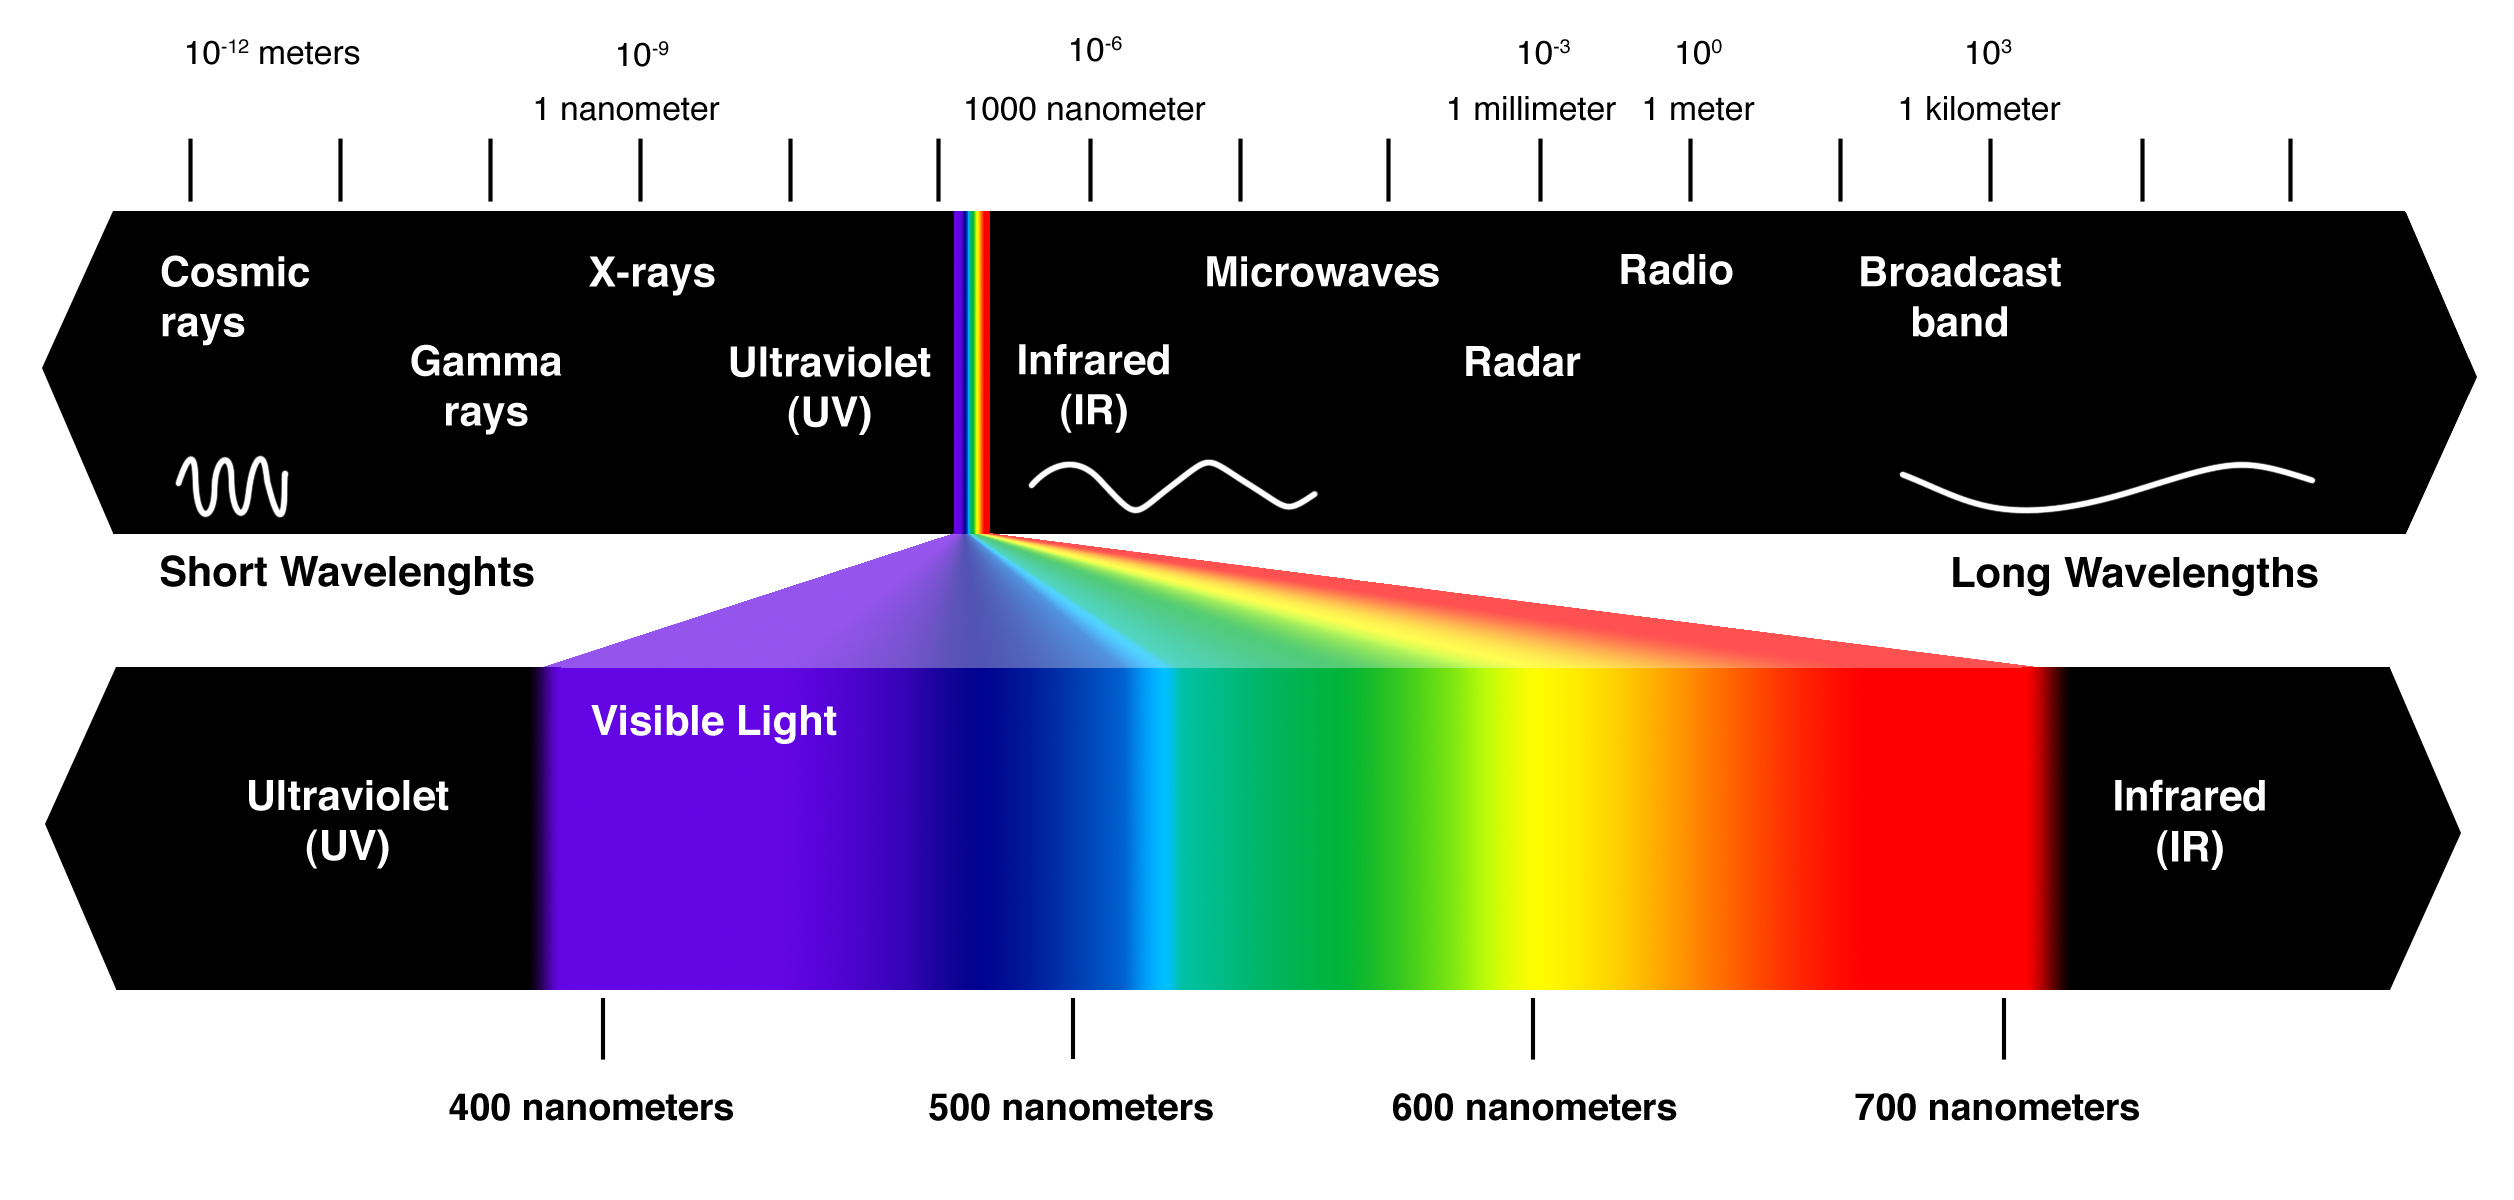
You can see below a presentation of the visible light spectrum.  Like a rainbow, this goes from ultraviolet (UV) to infared.
Image result for visual light spectrum
What's missing?

Notice that you don't see white, black, or brown.   But you can see white light, right?  So, where does white light come from?  Oooh, let's discuss!

Background
For those who don't know, I got my Bachelors of Arts in Cinema at San Francisco State University (go Gators!).  And while I do use my degree in my current position, mostly it just taught me some nifty terms (such as "neutral density filter"), random bits of trivia (such as what a "grip" does), and overall technical knowledge, the main one being: how does the mechanical eye of the camera differ from your human eye?

The myth of "white" light
One of the main things your eye does that a camera has to be told to do is to see all lights as white.  In film terms, light comes with a "color temperature".  The color temperature of light depends on the type of light:

Fluorescent- green
Incandescent/tungsten (interior)- orange
Daylight (sunlight)- blue, though the exact color blue changes throughout the day

The sunlight that your eyes see as "white" is actually really light blue.

Ott Light Note: this is essentially the science behind the "Ott Light" (see here).  The Ott Light (as well as the light in modern sewing machines) looks "blue" because it's matching the daylight (sunlight) color temperature.  However, there are two problems with this: 1) the rest of the lights (incandescent or LED) in the room will be orange in color, and not match the light, and 2) the color temperature of daylight changes throughout the day anyway.  Some people love their Ott Lights, but I just use a regular incandescent light for my hand sewing and beading, and it works great.

(On medium to high end cameras/camcorders, there is a "white balance" setting, to allow you to switch from light source to light source, and still maintain the "white" light.)

This is also why, if you're trying to match two different fabrics, or fabric and trim, it is recommended to take your fabric outside or close to a window, to see it in daylight, rather than under the store fluorescent lights.  The more reflective (i.e. shiny) fabric, such as silk or satin, will change tones more depending on which light source you're under.  Less reflective fabrics, such as cotton, won't change tones as much, and your eye tends to correct for these small changes anyway.  Stores in the LA Garment District will cut you a swatch of a fabric, so even if they won't let you take the bolt of fabric outside, you can take the swatch outside, or take it home.  Some online vendors will also sell swatches, which is REALLY helpful since dupioni and other silk solids come in a wide variety of colors.

Why does this matter?

The myth of white fabric
Imagine you're shopping online, and you look at fabric.  It's described as "white", the picture shows it as white, so it must be white, right?  You get it home, and it's slightly blue (or a cool white), or slightly yellow (or a warm white), only one of which looks good against your skin.  Ack!

See below for pictures of two different white silks (taken from www.fabric.com).  Both fabrics are described as "white", so why are there two?

Kaufman Radiance Cotton/Silk Satin White
Radiance silk- White
Kaufman Radiance Cotton/Silk Satin PFD White
Radiance silk- PFD White
See below for pictures of three different white cottons.  The first picture is taken under just incandescent light, the second using the flash on my phone.  Notice the HUGE amount of color variation between the two.

Three "white" cotton fabrics under regular indoor light.  Notice it looks almost tan, or almond.

The same three "white" cottons- with a flash.  Notice it looks slightly more blue.

My "Night Circus" 1885 bodice.  The center panels are made with white silk.  Or is it white?
Bodice "white" silk, against three cottons, using indoor light
Same as above, with flash.  See how the "white" silk is actually closer to the off-white cotton?  Aha!  Tricked you!
When I was looking at the silk to use for the center panel (and the matching underskirt), there were two "white" silks: white, and PFD (prepared for dyeing) white silk.  I got swatches for both (thank you, fabric.com!), and the regular white was a blue white, and looked HORRIBLE against my skin.  The PFD white, while just the slightest bit off-white, was slightly more yellow, and looked much better.  Since it was going to be contrasted against black, from a distance, it would look pure white.

Also, since you can see through it slightly, it looks even slightly more white because it's interlined with white cotton twill.

Really close up of the buttons, which are also white, and serve to show how the fabric is just slightly off-white.  The use of black thread to attach the buttons was a deliberate design feature.  I wanted the buttons to stand out, and since the thread was the off-white ("winter" white), I thought it might contrast slightly, and so I used black.

With flash.  It's pure white, I swear!
At Costume College 2016.  Under studio lights, so the center panel looks even more "white".  And yes, that's a Professor Slughorn wand from Harry Potter.  :)
With the white side of the underskirt.  Do you see it against the white ribbon trim of the overkirt?
Skin tone trick:
I learned this at Costume College last year, in a class taught by Lauren of American Duchess.  If you look at your veins, and they look more blue, you have a cooler skin tone.  If you look at your veins and they look green, you have a warmer skin tone.  While it's up to you what colors you choose in the end, we all have colors that we avoid like the plague, because they just "don't work" against your skin.

Color temperature in real life
I love the new show "Timeless" on NBC.  The plot is a little thin (basically this guy takes a time machine, and travels back to multiple times in American history to try and destroy current America, don't know why, and our three heroes take another time machine to chase him down), but the costumes are gorgeous!  If not totally period correct.  Which, actually, makes perfect sense in the context of the show.  So there, haters!

In the second episode, our courageous heroes go back to 1865 to chase down our disreputable bad guy, who is messing with the plot to kill Abraham Lincoln.  The main character, Lucy, ends up going to the theater with Lincoln's Chief of Staff, and so buys an evening gown.

In the first scene you see her in, I thought the satin contrast was a seafoam green.
Isn't she lovely?  Sorry, it's a bit blurry, she was moving,
For film and television, lighting is often made to look as though it comes from an already existing light source for the room.  For 1865 inside a hotel room, the obvious choices are wick lamps, candlelight, or fire from the fireplace.  So, a light looking somewhat "yellow" makes sense.

Now the trim looks almost periwinkle!  What gives?
And yet, in the next scene, they are in a theater, also supposedly lit by candelight, and yet gone is the "yellow" overtones.  The dress trim that looked green now looks almost periwinkle.  Same camera, same television, same channel.  Yet the lighting color changed from "yellow" to a much more distinct "blue".

Nifty film terms: the Director of Photography (also known as the Cinematographer, or "DP" for short) is responsible for the "look" of the film.  This means that everything that is seen by the camera is under his/her purview.  This is who wins the "Best Cinematography" Oscar.  Under him/her is the "Lighting Designer".  This person is responsible for designing what lights are placed where, with what filters, etc.

While I doubt many people may have noticed the color change, I had to rewind to make sure I wasn't going color blind.  :)

This is a prime example of not just color temperature in film and television, but also how the color of lights can affect the color of your fabric/trim.  And yet, both lights are "white".

To wrap things up: there is no "white" light, it's just what our eye "sees" as white.

And here's your costume closet of Zen:
Can I have this as my costume closet?
It's also supposedly "organized by region".  Jaw droppingly awesome!!

Happy sewing, friends!!

Since I won't be posting anything next week (unless I discover I have tons of time, shockingly), have a wonderful Thanksgiving!!

Thursday, November 10, 2016

Update: Purple Regency Dress Finished!! . . . or is it??

Dun, dun, dun!!

On Sunday, I headed off to the "Jane Austen themed tea", held at the LOVELY "French Estate" in Orange, CA.  Being me, of course I finished my outfit that morning!  :)
Lovely glamour shot by my friend, Trudy!
Dreaming of Mr. Darcy!!  Or Mr. Knight!!  Mmmmmmm.
My friend Nancy and I in one of the rooms at the house.  Doesn't she look lovely?
The tea was fun, with games, and LOTS of food.  I had thought when purchasing tickets that it was a "costumed" tea, meaning that we show up in costume, and get served tea.  Instead, it ended up being a "potluck" tea, with costumes encouraged, but not required, and food, plates, cups, etc. supplied by those attending.  The food was fantastic, but the tea arrangements left something to be desired.  :(

Once I tried my dress on for the first time, of course I immediately noticed what was wrong with it.  Even though I lengthened it two inches, it was still four inches off of the ground!  And something I hadn't noticed when making my mockups- I think my bust is lower than the standard, since the edge of the bodice hits me about 1.5" above where my short stays end.

Well, and the points of the sleeves are off, but that's usual, and can be easily fixed.  :)

I was pondering for the past few days: do I keep the whole think, and try to sell it?  Or do I rip it apart, save the skirt lining (which can be a few inches shorter) and sleeves, and cut out new everything else?  I think I'm going to end up taking it all apart, since I have more fabric, and MAYBE making a new skirt with the fashion fabric.  Since I need to lengthen the bodice, maybe that will give it enough length.  We shall see!!

Thursday, November 3, 2016

Update: Edwardian Tea Dress, Purple Regency Dress, Petticoats and more!


This is going to be a long post, because I haven't posted in awhile, but bear with me.  :)

Of course, because no costumer ever works on just one thing at a time, since my last post I've been working on things like mad!  Yes, I should have posted another update sooner, but have been busy.

(I feel like I should retitle my blog "A Costumer's Journey", so that with each update I can call it "My Journey So Far."  What fun!)

Aqua Edwardian Teens Dress
A continuation from this post.

Sadly, I didn't finish this dress in time for the tea that I was going to attend.  While I would have LOVED to have gone, it really didn't work out anyway, so I didn't end up going.  :(

The weekend after the tea, I got so excited about having a "free" weekend, I ended up picking up and working on three other things that I didn't need to.  But, that's the way it goes.  :)

(I'm participating in a fashion show this weekend, and apparently the person wearing Edwardian fell through, and so the organizer asked me if I had an Edwardian dress.  I told her about this one, and she told me I didn't need to worry about finishing it, she'll do something else.  I would have LOVED to be able to finish this, but I am so glad I don't HAVE to!)

But here's the status:

The orange makes all the colors very off.  Note to self: get new tablecloth!  Perhaps a cream.  Hmmm.
Cute little piping!

These are the closest to the true colors.  Oh, the shiny!

The unfinished inside.
Above you can see the status of the bodice, which is almost done, it just needs a little bit of hand sewing along the edges of the front.  But you can see I added some piping along the edges in the seafoam green, just to add a little bit of color, and to keep the edges neat.  :)

Inspired by one of my favorite Downton Abbey dresses, worn by Lady Mary, I added a bit of lace to the front, and let the edge stick up in the middle.  

Yummy, right?
Just for reference, here are the layers of skirt:


Next steps: finish the bodice, sew it to the skirt, and then add the band around the middle, and then add the hook and eye tape to the back.  DONE!  Easy, right?  Sigh.

Purple Regency Dress:
This weekend (ack! so soon!), I am attending the Jane Austen tea!  Yes!  A friend of mine is staying with me, and joining me in attending, and she was so excited about the tea that I needed to make a dress too!  Because of course I have the underthings, the hat (which I forgot to take a picture of), the shoes, the fabric and the pattern, but haven't had a chance to start it.  Of course.

Image result for sense and sensibility regency dress pattern
The dress pattern I am using.
Starting with the pattern, I am using the "Regency Gown Pattern" from Sense and Sensibility.  I had always intended to use this pattern for this dress, just because it seems relatively simple.

Of course, I started with making the skirts.  I don't know why I do this, I think so that I can get them neatly done and folded away before my fluffy one has a chance to decide to crush the fabric.  :)

Pretty purple fabric!  As you can see, it's also a sheer fabric.
Closeup of skirt placket and fabric.  So pretty!
The fabric I have had for years in planning this dress.  It's a purple (and brown) stripe pattern on a white background that I got at the LA Fabric District, in downtown Los Angeles.  I'm pretty sure it's 100% cotton, but it's lightweight, and sheer, and soft.

The only change I made to the skirt was to lengthen it 2", based on where the pattern pieces hit.

Note on skirt lengths:
Historical sewing skirt lengths are very interesting, and you can spend a lot of time arguing with people about where a "full length skirt" should hit.  I generally have two considerations: front poofiness of skirt, and heel height.  A good rule of thumb is to make your skirts 2" above the ground at all times.

For Civil War skirts, the general idea is between 2-4" off of the ground.  Anything less, and you're essentially just getting a dirty hem, and a hem you are likely to step on.  Of course, when you sit, those hems will hit the ground, but when you're standing or walking, they shouldn't.  My Civil War shoes have about 1/2" heel, so the heel doesn't really factor in.

For Bustle, I keep to the 2" above the ground rule.  My Bustle boots are about 2.5" tall, so I make my skirts about .5" longer when I am standing in bare feet.

For Regency and Edwardian, since there is no skirt structure (other than a petticoat or two), it is essential that skirts be on the longer side, so that they don't show ankle.  (Oh, no!)  2" is still a good length, but you can make them longer.

Note also that this just applies to the exterior skirt lengths.  Petticoats can be a bit shorter (and should be- we don't want to see those things on the exterior!)  Structured garments such as hoop skirts and bustles should go down to about 6" off the ground, petticoats should go down to about 4" off the ground (or, as a rule of thumb, 2" shorter than your skirt).  Underhoop petticoats can be 6" off the ground.

But I digress.

Bodice:

Unlike my Edwardian dress bodice (made up of less pieces, but with a middle piece, and darts, and that whole mess), this is actually going fairly fast.  
Bodice lining.

Piping at the neckhole edge.

Closeup of piping from inside.  Hand sewing- wheeeee!
In looking at the 1996 A & E Miniseries "Pride and Prejudice", they gave Elizabeth Bennet a fair number of sheer dresses.  This is one of the things I love about Regency- short sleeves, and low necklines, and frothy fabrics in the daytime!  Swooon!  So different from the stiff boned bodices of the Victorian era!

Image result for pride and prejudice 1996 full length dress
See how her skirt is separate from the underskirt, and her sleeves are not lined at all!  LOVE THIS!
In keeping with these sheer dresses, I decided to treat the sheer layer as the exterior, and treat the lining as a sort of separate piece.  I made the sheer bodice a little higher in the front and back around the neckline, and kept the lining shorter.

Bodice with the two layers attached at backs and armholes.

Front from the inside.  You can see where the sheer layer ends.
More piping!
Pretty buttons for the back!  Yay!
Next steps: Finish the sheer layer piping, add the sleeves, add the buttons, adjust the bodice to match the skirt width, and sew on the skirt layers,  And DONE!

But wait, there's more . . .
Did I mention petticoats?

In my weekend of "I'm free!" madness, I started working on a few "quick" projects that I had hanging over my head.

I had made a "quick and easy" Edwardian petticoat, and I decided, "I can't possibly leave this untrimmed!  Heaven forbid!"  Hence, a little bit of lace at the bottom.  The scalloped lace I HATE to try to machine sew on because of the curves, so lots of hand sewing.  But at least it's done!
Quick and easy!
And the fluffy one asks: "Why aren't you petting me?"

Backstitch hand sewing.  Because I'm that level of anal.
Since I had a Civil War reenactment coming up, I decided to work on a petticoat that needed a new waistband (unpictured), start a new underpetticoat that I had been meaning to work on since I retired my old one (also unpictured), and get my Edwardian corset cover to a place where I could work on the hand sewing at the reenactment.  Hence, I was sewing like mad that week to get everything to a "hand sewing" stage.

FLUFFY!!!

Closeup of fluffy!!  With buttonholes!
Next step: add buttons.  And then I'll be done!

What comes next after this weekend?  No real plans yet.  Next year I have a Colonial dress I need to make, and need to finish my lavender and black Natural Form dress, and maybe start my peacock and black Natural Form beaded dress.

What would you like to see get made next???  Take a look at my Project List and let me know!

I'm thinking I'll do another post with all the various projects where I have a hat and fabric, and decide based on a consensus.  :)  Vote early, vote often!!